
The walls get all the attention, but trim is what your eye actually lands on. Crisp white baseboards, clean door casings, crown that meets the ceiling in a sharp line — that's the difference between a room that looks freshly painted and one that looks professionally painted. And it's almost entirely about prep and a steady hand, not expensive tools.
Here's how to paint trim and baseboards the way our crews do it, from the prep nobody sees to the cut line everybody notices. The same approach works for casings, window stools, and crown molding.
Why is trim harder to paint than walls?
Trim shows every flaw. A wall in a flat sheen forgives a lot; a baseboard in semi-gloss catches light and shows every drip, brush mark, and wavy line. That's exactly why trim is where good painting separates from rushed painting — and why it's a big part of what we focus on in our interior painting work.
The good news: the skill is mostly in the setup. Get the surface clean, the seams caulked, and the line planned, and the actual painting goes smoothly. Three things decide how trim turns out.
- Prep. Clean, de-glossed, filled, and caulked. This is 80% of the job.
- The line. Where trim meets wall, ceiling, or floor — the cut line is what reads as "professional."
- The product and sheen. A real trim enamel in semi-gloss, applied in thin coats that level out.
Step by step: how to paint trim and baseboards
This is the order our crews follow on every interior job. Don't skip the prep steps to get to the paint faster — that's the trade that costs you a clean result.
Clean and de-gloss
Wipe trim down to remove dust, grease, and hand oils, then scuff-sand any glossy areas so the new paint can grip. On older homes this one step prevents most peeling at the edges.Fill, caulk, let it set
Fill nail holes and dents, then run a thin bead of paintable acrylic caulk where the trim meets the wall and at the mitered corners. Let it skin before you paint so it won't smear.Prime bare and patched spots
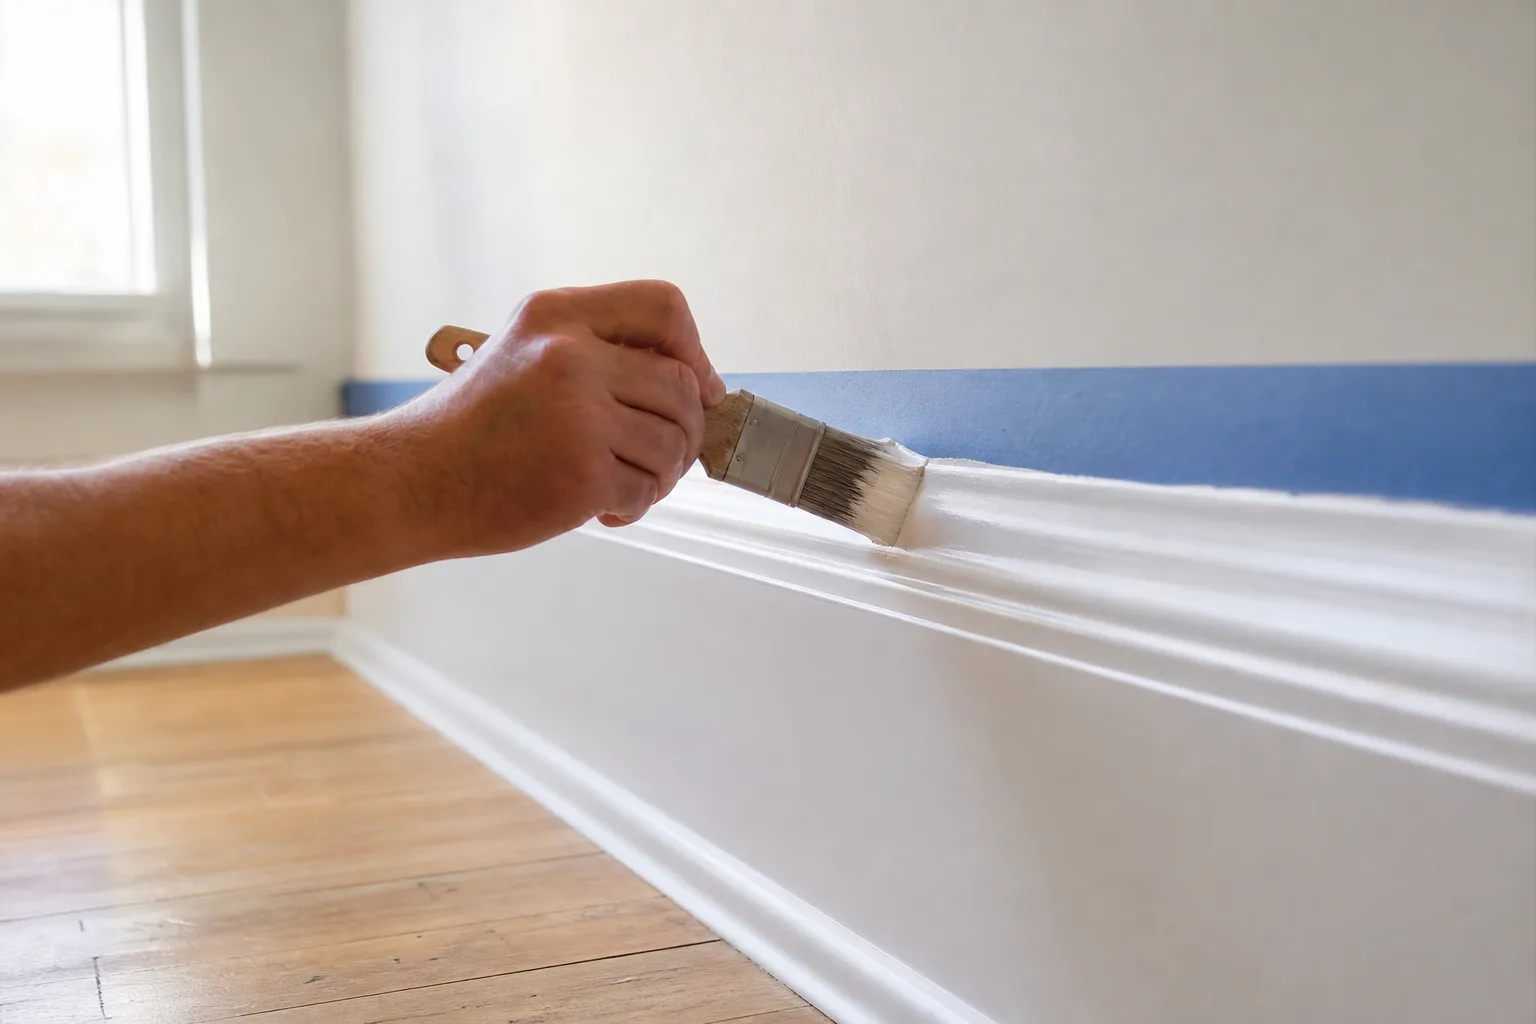
Spot-prime raw wood, filler, caulk, and any color you're covering. Primer seals the surface and evens out how the topcoat's sheen reads across the whole run.Cut a clean line
With a quality angled sash brush, cut a steady line where trim meets the wall and ceiling. Keep a wet edge and work in sections so the paint never dries mid-cut.Coat the faces, then recoat
Brush the flat faces with the grain, lay off in long strokes to level marks, let it dry fully, and add a second coat for depth and durability.
The single most common mistake we see in DIY trim work is rushing the caulk and the cut line. Caulk is what makes the seam between trim and wall disappear; the cut line is what makes the whole room look sharp. Slow down on those two and everything else falls into place.
Caulking: the step that makes it look seamless
A clean caulk line is the secret behind professional-looking trim. Without it, you see every gap between the casing and the wall, and on the Gulf Coast those gaps also let humid air get behind the trim. With it, the trim and wall read as one solid, finished surface.
Use a quality paintable acrylic or siliconized acrylic caulk — never pure silicone, which paint won't stick to. Cut the tip small, run a thin continuous bead, and tool it smooth with a damp finger so it fills the seam without globbing. Fill nail holes the same way or with spackle. Then let it skin over before paint goes on. This is also the moment to flag any trim that's rotted or pulling away from the wall; soft or damaged wood needs to be repaired first, which is where our carpentry and wood repair work comes in before a drop of paint is applied.
Choosing the right paint and sheen for trim
Answer-first: use a dedicated trim or door-and-trim enamel in semi-gloss. It's formulated to level out brush marks, dry hard, and wipe clean — exactly what baseboards and casings need.
Sheen matters more on trim than anywhere else in the house:
| Sheen | Best for | Trade-off |
|---|---|---|
| Semi-gloss | Baseboards, casings, crown, doors | Shows surface flaws, so prep has to be clean |
| Satin | A softer, less shiny trim look | Slightly less scrubbable than semi-gloss |
| High-gloss | A bold, formal, furniture-like finish | Unforgiving — every imperfection reads |
Most homeowners want trim to read crisper and a touch shinier than the walls, which is why semi-gloss is the default. If you're deciding whether the trim should even contrast with your walls or blend in, that's a color question worth thinking through before you buy paint — and you can preview both looks on a photo of your own room with our free AI Color Visualizer before you commit.
Crown molding: same rules, higher up
Crown molding follows everything above, with two extra considerations. First, you've got two cut lines instead of one — the top against the ceiling and the bottom against the wall — so caulk both seams for that clean, built-in look. Second, you're working overhead, so set up stable footing and load the brush a little lighter to avoid drips running down the profile.
You almost never need to take crown down to paint it. Painting it in place gives a better result and avoids cracking the molding. Cut your lines carefully, coat the contoured face in thin passes so paint doesn't pool in the detail, and let each coat dry hard before the next.
The tools that actually make a difference
You don't need a truckload of gear to paint trim well, but a few things are worth getting right. A quality angled sash brush — two to two-and-a-half inches — is the single most important tool, because the cut line lives or dies on the brush. Cheap brushes shed bristles and won't hold a clean edge. Pair it with a small foam or microfiber mini-roller for the flat faces of wide baseboards if you want an even film with fewer brush marks.
Beyond that: a good painter's caulk and a caulk gun, a sanding sponge for de-glossing, quality painter's tape for textured walls, and a damp rag always in your pocket for catching a stray mark before it dries. Skip the gadgets. Where homeowners go wrong isn't the tools — it's rushing the prep and overloading the brush.
When to call in a crew
Trim is the most satisfying DIY paint project and also the most frustrating, because the margin for error is small. If you've got a houseful of trim, intricate crown, old oil-based paint that needs to be converted, or wood that's soft and pulling away from the wall, the time and patience add up fast — and a wavy line or a peeling edge undoes the whole effort.
Trim, baseboards, and crown reward patience more than any other part of a paint job. If you'd rather have it done right the first time — caulked, primed, and cut to a sharp line — we're a family-owned crew that's painted Gulf Coast interiors since 2013, backed by a 3-year workmanship warranty and a manager sign-off before the job is called done. Reach out for a free in-home estimate and you'll have a written quote within 24 hours.