
The crack runs from the top corner of the window halfway to the ceiling, and it comes back every couple of years no matter how many times someone fills it. If you own one of Mobile's pre-war homes, you know the wall. That's plaster on wood lath, and painting plaster walls the right way starts long before the brush comes out — it starts with understanding why the surface behaves the way it does.
Most homes in Mobile's older neighborhoods were built around lath-and-plaster construction. The city's median home is roughly 49 years old, and the historic districts run far older than that, into the early 1900s — the plaster-walled homes of Midtown, Oakleigh Garden, Leinkauf, and Old Dauphin Way are exactly the ones we mean. Those walls are solid and worth keeping. They just need a different hand than the drywall in a new subdivision.
Why do plaster walls in older Mobile homes crack and chalk?
The short answer: wood moves, and old plaster sits on wood. Behind the smooth surface are thin wood strips (lath) with plaster pushed through the gaps to form "keys" that grip the wall. Over the decades, two things work against that bond.
First is humidity. Mobile sees about 52 inches of rain a year and runs humid for most of it — that's the Gulf Coast climate at work — so the wood lath swells and shrinks with the seasons. That constant movement opens hairline cracks along the same lines, year after year. Second is settling — a house that's stood for eighty or a hundred years has shifted, and plaster is rigid, so it cracks instead of flexing.
You'll also find chalky spots where the lime surface has aged, and the occasional hollow area where the plaster has let go of the lath entirely. None of this means the wall is bad. It means the prep has to address the real condition, not just hide it for a year.
How we paint plaster walls so the finish lasts
Answer first: we stabilize and patch the cracks, skim the surface flat, seal it with the right primer, and topcoat in a flatter sheen that hides imperfection. Skipping any of those steps is how a fresh coat ends up cracked again by the next humid summer. This is the same prep-first approach we bring to every interior painting project — on a hundred-year-old wall it just matters more.
Assess the plaster at the free estimate
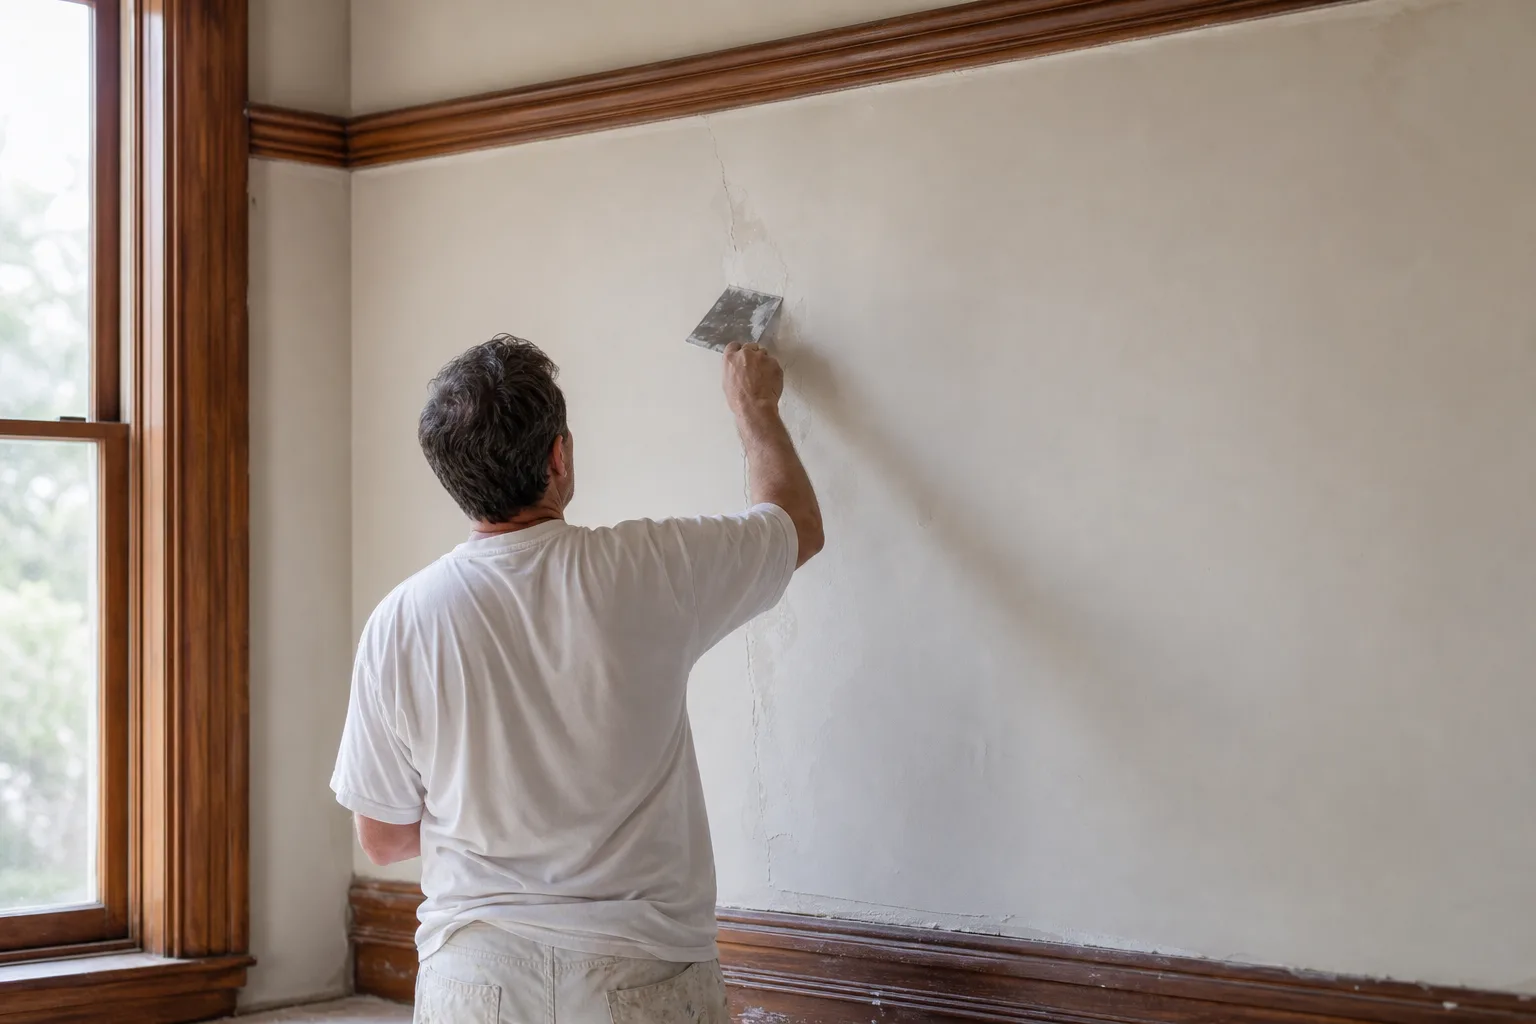
We map the cracks, press for soft or hollow spots where plaster has pulled off the lath, and note chalky or water-stained areas so the plan matches the actual wall.Stabilize and patch the cracks
We re-anchor loose plaster, tape stable hairline cracks, and use a flexible patch on moving cracks, then feather each repair into the surrounding wall.Skim and sand to an even surface
We skim-coat the patched areas and rough fields, then sand flat so old waves and trowel marks are knocked down before any paint.Seal the plaster with the right primer
We prime bare and repaired plaster to lock down chalk, even out the porous surface, and stop the topcoat from flashing.Paint with a finish that hides imperfection
We roll a matte or eggshell topcoat in even coats so the color lays smooth and the flatter sheen hides the home's age.
The patching is where experience shows. A stable hairline crack can be taped and skimmed and stay put. A crack that's still moving needs a flexible repair, or it will telegraph straight back through your new paint within a season. Knowing the difference on the wall in front of us is the difference between a repair that holds and one you're filling again in two years.
Choosing a finish that hides a century of waves
On plaster, sheen is your friend or your enemy. A flat or matte finish scatters light and hides the gentle waves, old patches, and trowel texture that come with a wall this age. A satin or semi-gloss does the opposite — it reflects light and spotlights every ripple. That's why we lean toward matte and eggshell on plaster wall fields and save the shine for the trim and doors.
Color helps too. Mid-tone and warmer colors are more forgiving on an uneven surface than a stark, cool white under raking afternoon light. If you want to see options on your own walls before committing, our color consultation is built for exactly that decision.
| Finish | On plaster walls | Best use |
|---|---|---|
| Matte / flat | Hides waves and old patches best | Living rooms, bedrooms, hallways |
| Eggshell | Hides well, wipes a little easier | Higher-traffic walls |
| Satin | Starts to reveal texture | Generally not the wall field |
| Semi-gloss | Spotlights every ripple | Trim, doors, not walls |
When plaster repair becomes drywall work
Sometimes a wall is too far gone in spots — large failed sections, old water damage, or a patchwork of bad past repairs. In those cases the right move is a proper patch that blends into the surrounding plaster, and our drywall repair and painting crew handles that so the fix disappears instead of standing out as a flat rectangle on a textured wall.
If your home is pre-1978 — and most of Mobile's plaster homes are — there's a safety layer too. Old paint can contain lead, and sanding or scraping it without the right containment puts dust where you don't want it. We cover the full safe-prep process in our guide to lead-safe paint prep for older Mobile homes; read that alongside this one if your house predates 1978.
Plaster is worth keeping — and worth doing right
Original plaster gives Mobile's older homes a depth and solidity that new drywall can't fake. The walls just ask for a painter who respects how they're built. Painting plaster walls well is mostly patient prep: stabilize the cracks, skim it flat, seal it, and finish it in a sheen that flatters the home's age. Do that, and the same crack that's haunted you for years finally stays gone.
If you're in Midtown, the historic districts, or anywhere in Mobile, we'd be glad to take a look. For more on these old homes' quirks, see our interior painters for Midtown Mobile bungalows. When you're ready, book a free in-home estimate and we'll give you a written quote within 24 hours.