
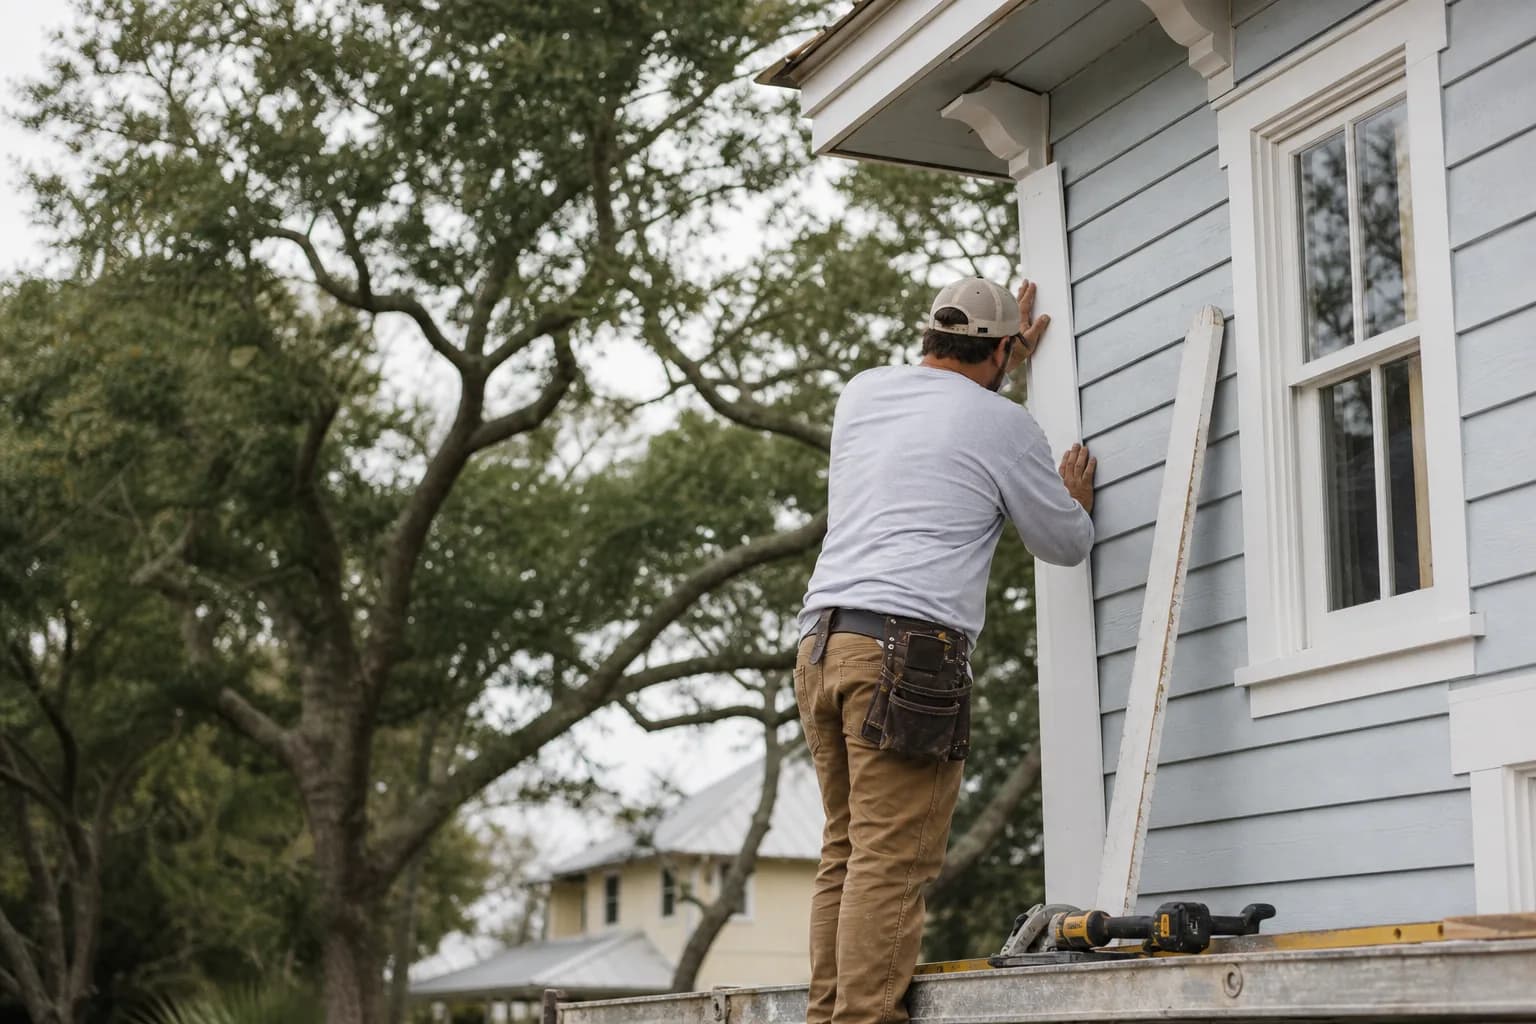
The repaint quote looks great until you notice the line that isn't on it: the trim. From the street, the corner boards and the fascia along the roofline look painted and fine. Up close, the corner board has split at the bottom, a miter on the casing has opened a quarter inch, and the fascia behind the gutter flexes when you push it. A cheap bid paints right over all of it. A good one fixes the wood first — because that's the carpentry that decides whether the finish around your roofline and corners holds.
Here's the part homeowners rarely get told: exterior trim repair before painting isn't an upsell tacked onto a paint job. Trim is where a house takes the most weather and holds the most joints, so it's where paint fails first when the wood underneath is bad. This guide covers the trim that needs attention before a repaint — fascia, corner boards, the frieze, casing — how we decide repair versus replace, and how the carpentry carries through into a finish that lasts.
Why is exterior trim the first thing to check?
Of all the wood on a house, trim works the hardest. Fascia runs the full roofline catching runoff. Corner boards take wind-driven rain from two directions. The frieze board tucks under the eave where water lingers. Casing frames every door and window, where joints and end grain meet weather. These are the pieces that move, split, and pull loose — and every one of them is a seam the paint film has to bridge.
On a Gulf Coast home, all of that gets pushed harder. Humidity keeps wood from fully drying, wind-driven rain drives water into the joints and board ends, and hard southern sun opens up caulk and paint until moisture gets behind it. So the corners, miters, and butt joints are exactly where a coat cracks open first — and once water is in the wood, no amount of fresh paint pushes it back out.
What to look for before you paint
Trim problems rarely show up as an obvious hole. They show up as movement, gaps, and paint that won't stay put. A slow walk around the house tells you most of it. Check these runs on each elevation:
- Fascia along the roofline — soft spots, cupping, or flex behind the gutters, where runoff concentrates and water sits.
- Corner boards — splits at the bottom ends, separation from the siding, and exposed end grain wicking water up the board.
- The frieze board under the eave — shaded, slow to dry, and easy to overlook until it's soft.
- Door and window casing — open or gapping miters, popped nails, and soft bottoms where the casing meets the sill or threshold.
- Any joint where the caulk has failed — a cracked or pulled-away caulk line is an open door for water, not just a cosmetic flaw.
The test is simple: press a screwdriver or your thumb into anything dark, cracked, or suspect, and tug gently on anything that looks loose. Sound wood pushes back and stays put. Bad trim gives, flexes, or moves — and that board needs carpentry before it needs a coat of paint.
The trim carpentry sequence, step by step
When we find bad trim at an estimate, we don't smear filler over it and move on. There's a sequence, and following it is what makes the repair last as long as the paint over it. Here's how a sound trim repair goes.
Inspect every run of trim
We walk the fascia, corner boards, frieze, and casing on each elevation, marking splits, cupping, open miters, popped nails, soft ends, and boards pulling off the wall. That tells us exactly what needs carpentry before a brush touches the house.Decide repair or replace, board by board
A bad section of an otherwise sound board gets cut out and patched in. A board that's split end to end, cupped, or rotted through gets replaced in full. We make that call piece by piece and tell you which is which, so the bid is honest.Remove the bad wood and check behind it
We pull the damaged trim and inspect the sheathing, flashing, and framing behind it. If a leaking gutter or missing flashing drove the damage, we fix the water source first — new wood rots on the same schedule if the water is still getting in.Cut, fit, and fasten the new trim
We cut paint-grade wood — or PVC where moisture keeps winning — to fit, set tight miters and butt joints, and fasten into solid framing with corrosion-resistant nails so the boards stay put through wind and seasons.Prime every face and cut end
Every face and every cut end gets primed before the trim is finished. Bare end grain drinks water and is where the next round of rot starts, so nothing goes back unsealed.Caulk the joints and carry into the paint
We seal the joints where trim meets siding, corners, and casing with a flexible exterior sealant, then finish the trim in the same coat system as the rest of the house — so the repair is protected and you can't pick it out from the curb.
That last step is the one that falls through when carpentry and painting are two different companies. A separate carpenter rebuilds the corner board and leaves — and now there's bare or primer-gray trim sitting in the weather until someone else gets to it. On the coast, that gap is long enough for new wood to start weathering before it's ever sealed.
Repair, replace, or upgrade — how we decide
There's no single answer for bad trim. The right call depends on how far the damage has gone, where the water is coming from, and how likely that board is to fail again. Here's the framework we use, so the recommendation on your estimate makes sense.
| Trim condition | What we usually do | Why |
|---|---|---|
| Small bad section, board otherwise sound | Cut out and patch in a primed piece | Keeps the original run and profile; the clean fix when most of the board is still solid |
| Board split, cupped, or rotted through | Replace the full length in paint-grade wood | Filler can't carry a board that's mostly gone; new wood, primed on all sides, restores real strength |
| Trim that has failed before | Replace with PVC or composite | It won't rot again; still primed and painted for color and UV, worth the higher cost on a repeat offender |
| Open joints and popped nails only | Re-fasten, re-caulk, then paint | Tightening and sealing the seams stops the water before it ever becomes a rot or replacement problem |
The wood-versus-PVC question comes up on almost every older home. PVC and composite don't rot, which is the whole appeal — but they cost more, and they still get primed and painted. Where they earn their keep is the trim that's already failed once: a corner that stays wet, fascia behind a gutter that keeps overflowing. Where good primed wood is the smarter spend is protected, well-drained trim that's never given trouble. Usually the right answer is a mix.
Why we keep the carpentry and the paint together
A trim repair isn't done when the new board is fastened. It's done when that board is primed on every face, caulked where it meets the siding and corners, and carried into the same finish as the rest of the house — so it's sealed against the next wet season and invisible from the curb. When one accountable crew owns both the carpentry and the painting, that hand-off never gets dropped. A manager signs off before final payment, and the work — wood repair and paint both — is backed by our 3-year workmanship warranty. We've been family-owned and working Mobile and Baldwin County since 2013, and we're EPA RRP Lead-Safe certified, which matters on the older homes here where bad trim and lead paint often turn up together.
Trim is just one of the spots wood gives out first. For the full picture on rot, fascia, soffit, and prep, see our carpentry and paint-prep guide to wood rot. If it's a window that's gone soft, our window sill and casing rot guide covers that; for a door that's soft at the base, see exterior door-frame rot repair; and for where rot tends to start in the first place, the common spots wood rot starts on a house. You can also read more about our carpentry and wood-repair service and how it pairs with our exterior painting service.
The bottom line: don't paint over bad trim, and don't let a bid skip it to come in cheaper. Fix the wood, fasten it, prime it, seal the joints, then protect it with paint — in that order. If you've got split corner boards, soft fascia, or trim pulling loose, the next step is simple. Call us for a free in-home estimate, and we'll check the wood honestly and email you a written quote within 24 hours.