
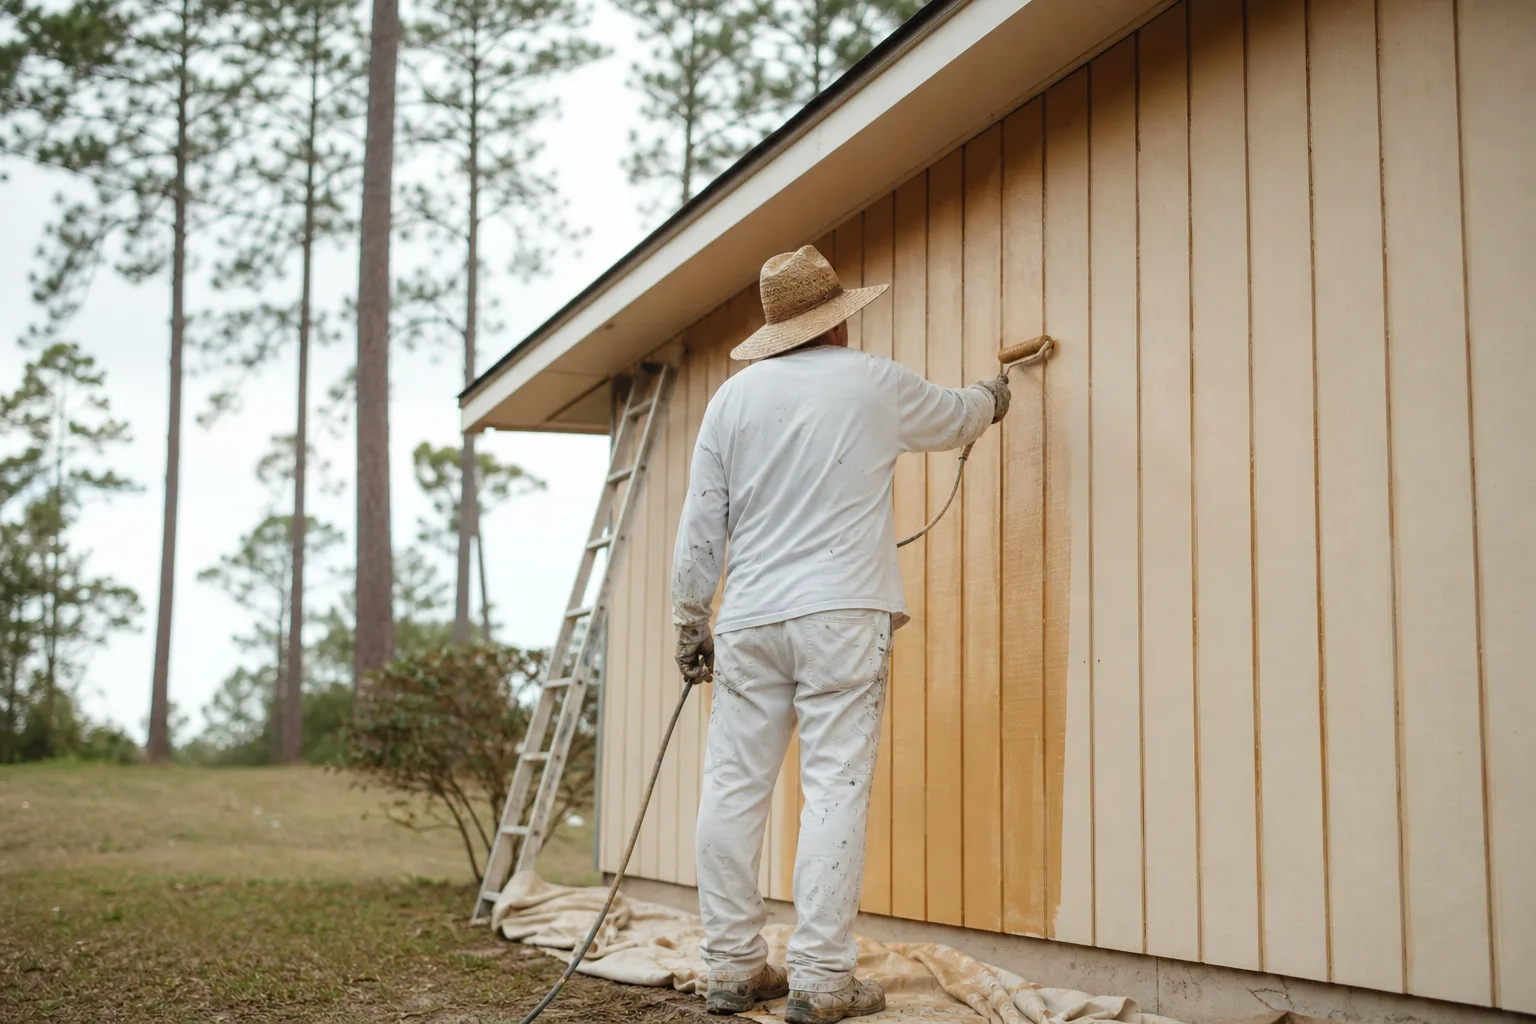
T1-11 has a look you either love or live with: those tall vertical grooves cut into a sheet of exterior plywood, run up the walls of ranch houses, sheds, and cabins across the coast. It's affordable, it's been on homes here for decades, and it'll last if it's painted right. The trouble is that T1-11 is plywood — wood plus glue in thin layers — and give water a way into one of those layers and the sheet starts coming apart. On the Gulf Coast, where humidity, sun, and splashback never let up, painting T1-11 is about keeping water out of the grooves and the edges.
Here's how to paint T1-11 siding so it actually lasts down here, and the two places — the grooves and the sheet edges — that decide whether it does.
How to paint T1-11 siding: the short version
You can absolutely paint T1-11, and a primed-and-painted sheet holds up well even in our climate. The job comes down to five things: wash it and let the plywood dry, replace any sheets that have started delaminating, caulk the seams and seal every cut edge, spot-prime the bare wood and the raw grooves, then put on two coats and make sure paint fills the grooves instead of skimming over them.
What makes T1-11 different from lap siding is that it's a full 4-by-8 sheet of plywood standing on end, with milled grooves and exposed cut edges top and bottom. The grooves and the edges are raw, water-hungry wood, and they're exactly where a rushed paint job fails. Get those two right and the flat faces take care of themselves.
Prep is the whole job: wash, dry, inspect
Prep is 80% of a paint job that lasts, and on plywood siding that number climbs. Start by washing the siding to strip off dirt, chalk, and the mildew our humidity grows — and work the grooves, because that's where grime and spores hide. Then leave it alone. Plywood needs to dry thoroughly before paint, and in Gulf Coast humidity that means a full day or two, not a sunny afternoon. Seal paint over a damp sheet and you trap moisture in the plies, which is exactly how plywood blisters, checks, and lets go.
While it dries, walk every wall. T1-11 fails in specific places, so look hard at the bottom edges near grade, the grooves, the corners, and any south- or west-facing wall that's been baking in the sun for years. You're hunting for plies that are lifting or separating, surface "checking" (those fine cracks that open along the grain), and any spot that's gone soft or spongy. That's water already in the wood, and paint will not fix it.
Why do the grooves and edges decide whether T1-11 lasts?
This is the part that separates a T1-11 job that lasts from one that peels, and it's the part a rushed crew skips. Two features of this siding need special attention: the grooves and the cut edges.
The grooves are milled into the face, which means they expose raw end-grain and they sit in shade and hold water longer than the flat surface. Left thin on paint, they fade, check, and peel first while the rest of the wall still looks okay. The cut edges are worse. The bottom edge of every sheet is exposed plywood end-grain, sitting right where splashback, standing water, and ground moisture get at it — and end-grain drinks water like a straw. Unsealed, that bottom edge wicks moisture up into the panel, the plies separate, and the sheet rots from the bottom up.
So the move on a repaint is: caulk the joints that should be caulked, and seal everything raw. Caulk the vertical sheet seams, the trim, and penetrations with a quality exterior sealant. Then prime every exposed edge — the bottom edge especially — and prime any bare groove. Keeping the bottom edge an inch or two up off grade helps too, so it's not sitting in wet soil. This edge-and-groove sealing is the single highest-payoff work on the whole job.
The right paint, and getting it into the grooves
Once the siding is clean, dry, repaired, and sealed, spot-prime the bare wood — sanded spots, repairs, new sheets, raw grooves, and edges — with a quality exterior wood primer so the topcoat bonds and the grain doesn't telegraph through. Then it's two coats of a quality 100% acrylic exterior paint. Acrylic flexes as the plywood expands and contracts through our heat and humidity, and it sheds water instead of trapping it under a brittle film. Some homeowners prefer a solid-color stain on T1-11, which works fine, but a full primed-and-painted acrylic system gives the most water protection on exposed coastal walls, and our guide to the best exterior paint for salt air and humidity walks through the products that earn their keep here.
The technique that matters most on T1-11 is filling the grooves. When you spray, paint wants to bridge across the top of a groove and leave the channel thin — and a thin groove is the first thing to fail. So we back-roll every sprayed coat and brush the grooves directly, working paint down into the channel so it gets the same film thickness as the flat face. That's the difference between grooves that hold for years and grooves that peel by next summer. Here's the full sequence we follow.
Wash and let the plywood dry
Wash off dirt, chalk, and mildew, working the grooves where grime hides, then give the plywood one to two full dry days. Coastal humidity slows drying, and painting damp plywood traps moisture in the plies.Inspect for delamination and soft plies
Walk every wall. Replace any sheet with lifting plies, surface checking, or soft spots — especially bottom edges and sun-blasted walls — before you paint. Paint can't rebond split plywood.Caulk the seams and seal every edge
Caulk the vertical sheet seams, trim, and penetrations with a quality exterior sealant, and prime every cut edge — the bottom edge most of all, where end-grain wicks water and the panel rots from the bottom up.Spot-prime bare wood, grooves, and repairs
Prime all bare plywood, sanded areas, raw grooves, and new sheets with a quality exterior wood primer so the topcoat bonds evenly and the grain doesn't bleed through.Spray and back-roll two coats into the grooves
Apply two coats of a quality 100% acrylic exterior paint, back-rolling sprayed coats and brushing the grooves so paint fills the channels to full thickness instead of bridging over them.
If you're weighing T1-11 against other materials, our guide on how to paint LP SmartSide engineered wood siding covers the engineered-wood cousin, and how to paint wood lap siding on the Gulf Coast covers traditional clapboard. The big-picture plan for our climate lives in our coastal exterior painting guide.
When to call a pro
Plenty of homeowners paint their own T1-11, and on a single-story home or a shed it's a realistic weekend-plus project. Where it gets real is two-story walls, widespread edge and groove sealing, sheet replacement, and the spray-and-back-roll work that gets paint into every channel evenly. Get the edges or the grooves wrong and the cost of redoing the wall dwarfs what you saved doing it yourself.
If your T1-11 is fading, chalking, or showing soft edges and lifting plies, the smart first step is a free, honest look. We'll tell you straight whether it's a repaint or whether some sheets need to come off first, and you'll get a written quote within 24 hours. Our exterior painting crew handles the wash, the repairs, the edge and groove sealing, and two coats — backed by our 3-year workmanship warranty. Book a free estimate and we'll get your plywood siding set up to last.