
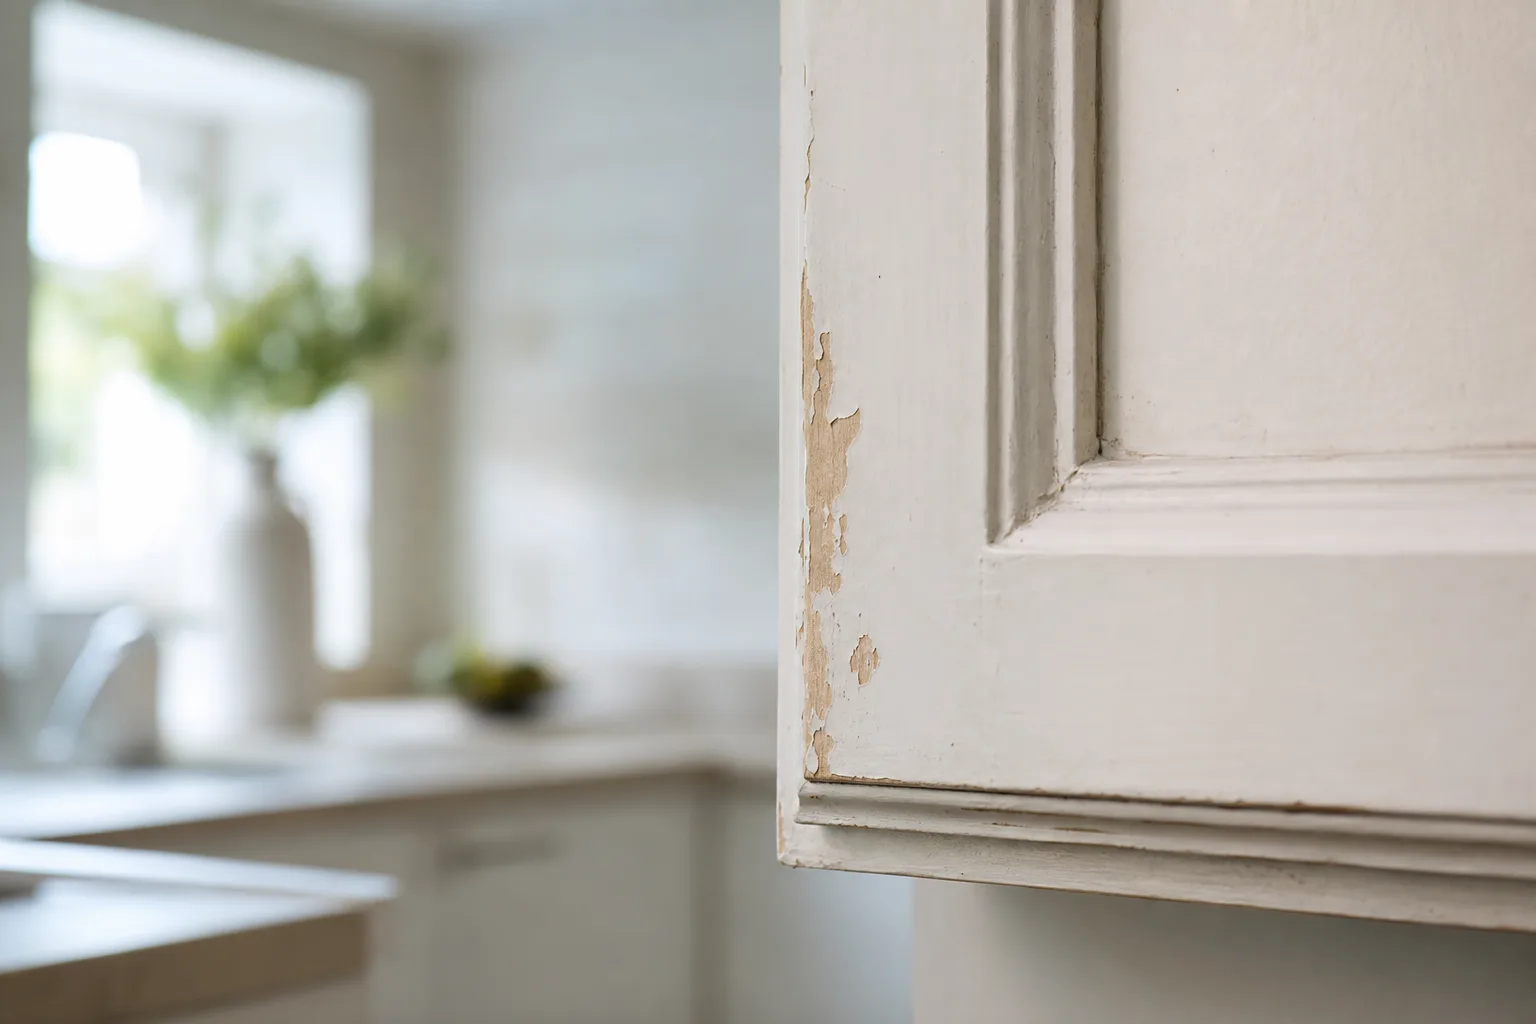
You spent good money getting the kitchen cabinets painted, and within a few months the corners are chipping, the edge by the trash pull-out is lifting, and one door looks like the finish is peeling off in a thin sheet. It's one of the most frustrating things in a home — and one of the most avoidable. Cabinet paint chipping is almost never bad luck or bad paint. It's a prep-and-cure problem, and a predictable one.
Cabinets live the hardest life of any painted surface in the house. Hands, grease, steam, cleaning sprays, pans, and doors slamming shut all day. A finish only survives that if everything underneath it was done right. Below is exactly why painted cabinets chip and peel, and the steps that prevent it — so you can tell a job that will last from one that's already failing.
Why does cabinet paint chip and peel?
The short answer: cabinet paint chips when the finish never properly bonded to the surface, or never fully hardened before it went back into daily use. Both are prep-and-cure failures, not paint failures. The color in the can is rarely the problem — what happened before and after it was sprayed is. Here are the real causes, in the order they cause trouble.
Grease that was never removed
This is the number one cause. Kitchen cabinets carry years of an invisible film of cooking grease and oils, heaviest around the stove and the most-used doors. Paint can't bond through grease — it sits on top of it. So the finish looks perfect on day one, then starts releasing wherever the surface was greasiest, usually at the edges and around the range. No paint, however good, sticks to a dirty surface. Full degreasing is non-negotiable.
A slick surface that was never sanded
Cabinets come with a hard, slick factory finish — and slick is the enemy of adhesion. Paint needs a slightly roughened surface to grip. Skip the scuff-sanding and the new coat has nothing to hold onto, so it peels off the glossy old finish in sheets, often lifting cleanly at a corner where you can get a fingernail under it. Laminate and thermofoil are the worst offenders here, which is why they need extra attention.
The wrong primer — or no primer
Even degreased and sanded, a slick cabinet needs the right bonding primer to lock the finish to the surface. A general wall primer, or no primer at all, leaves the coat sitting loose on top. The right bonding primer is what actually grabs the old surface and gives the finish something permanent to bond to. Match it to the material — what works on solid wood isn't what works on laminate.
Wall paint instead of a hard enamel
Cabinets need a hard, durable cabinet-grade enamel, not the wall paint that's fine on a bedroom. Wall paint stays relatively soft and was never designed for the constant contact a cabinet takes. Put it on doors and it scuffs, chips, and shows wear fast. The right product cures to a tough, washable finish built to take daily knocks. For more on the materials, see our guide to the best paint and enamel for kitchen cabinets.
Finish that never fully cured
This one catches even careful DIY jobs. Paint is dry to the touch in hours, but it isn't cured — at full hardness — for days to a few weeks. Load the dishes back in and start slamming doors while the finish is still soft, and you'll press chips and dents into a coat that simply wasn't ready. The cure is as important as the coat.
How to prevent cabinet paint from chipping
Prevention is just the absence of those shortcuts. Done in order, these steps are what make a cabinet finish last for years instead of months — it's the same sequence a professional job follows, and the same one that decides whether your finish holds up.
Degrease every surface completely
Clean and degrease every door, drawer front, and box. Years of cooking grease will reject paint and cause chipping if it isn't fully removed — this is the step DIY jobs skip most.Scuff-sand for adhesion
Sand or scuff-sand every surface to dull the slick factory finish so primer and paint have something to grip. This is what stops the finish from peeling off in sheets.Prime with the right bonding primer
Use a bonding primer matched to your cabinet material — especially on slick laminate or thermofoil — so the finish coats actually bond instead of sitting loose on top.Spray a hard cabinet-grade enamel
Spray a durable cabinet enamel in thin, even coats rather than rolling on wall paint. A hard enamel resists the daily knocks and cleaning that chip a soft finish.Cure fully before normal use
Let the finish reach full hardness before the cabinets go back to daily use, so the coat is hard enough to resist chips when you start using the kitchen again.
The cure step is where our process has a real edge, and it's also why our way is the least invasive. We take the doors and drawer fronts off and bring them to our own facility, where they cure in climate-controlled drying and preparation booths — a dust-free, humidity-controlled space — which matters a lot on the Gulf Coast, where kitchen humidity can keep a finish soft and trap dust in it. Cabinet parts left to dry in the driveway never get that protection. The cabinet boxes stay bolted to your walls and get sanded and painted in place, so your kitchen stays usable while the controlled environment lets the doors harden factory-smooth and resist chips from the first day you're back to cooking. For the full rundown of how a job runs start to finish, see the cabinet painting process step by step.
Why a cheap cabinet job costs more
A cabinet quote that's a fraction of the others is almost always skipping the steps above — and cabinets punish that faster than any other surface in the house. Skip the degreasing and it won't bond. Skip the sanding and it peels. Skip the cure and it dents. Within a year you're looking at chipped edges and lifting doors, and the lasting fix is to strip it and start over. That's paying twice for one kitchen.
Done right, a painted kitchen is a genuine value — a fraction of the cost of new cabinets, with a finish that holds up for years. The difference between the two outcomes isn't the color you pick. It's whether the prep and cure were done properly. To weigh refinishing against the alternatives, see cabinet painting vs. replacing, and how long a cabinet paint job lasts in the humid Gulf Coast.
The bottom line on chipping cabinets
Painted cabinets chip for reasons you can prevent: grease left on, sanding skipped, the wrong primer or none, soft wall paint, and a rushed cure. Get those five right — full degreasing, a good scuff-sand, the right bonding primer, a hard enamel, and a proper cure — and the finish bonds and stays put through everyday kitchen life.
If your cabinets are already chipping, or you want them painted so they never start, the surest path is a professional who treats prep and cure as the whole job. Our cabinet painting crew refinishes the doors and drawers in our climate-controlled facility booths, paints the boxes in place so your kitchen keeps working, and stands behind it with a 3-year workmanship warranty. Book a free in-home estimate and you'll get a written quote within 24 hours, with the prep and the timeline spelled out before any finish is sprayed.