
A wall can be perfectly sound and still be a problem to paint. Old orange-peel texture you've grown to hate. A bedroom wall pocked with a decade of nail holes and furniture scuffs. The chalky haze of wallpaper glue that never quite came off. None of that is one repair you can patch — the whole surface needs to come back to smooth. That's what a skim coat does.
Skim coating means spreading a thin, even layer of joint compound across an entire wall and sanding it flat, so what you're left with is a uniform, paint-ready surface instead of a patchwork. It's the move that erases texture, hides a wall full of small damage, covers glue residue, and takes a surface up to a true smooth, level-5 finish. Here's how to skim coat a wall the way we do it, and where the patience pays off.
When should you skim coat instead of patch?
The simplest way to decide: patching fixes a spot, skim coating fixes a wall. If you've got a single hole or crack, you don't need a skim coat — you tape, mud, and feather that one repair. (For the bigger holes, our guide to repairing large drywall holes and resurfacing a wall walks through it.)
You reach for a full skim coat when the problem is everywhere:
- Killing old texture. Knockdown or orange peel you want gone, replaced by a clean, modern smooth wall.
- A wall full of small damage. Dozens of nail holes, scuffs, dents, and old patches that would look like a constellation if you just spot-fixed them.
- Wallpaper-glue residue. After the paper comes off, the leftover adhesive leaves a wall that won't paint cleanly until it's resurfaced.
- Going to level 5. The highest drywall finish — a skim coat over the whole surface so no seam, shadow, or texture shows under flat paint in a bright room.
What a level 5 finish really means
Level 5 is the top of the drywall finishing scale. Below it, the joints are taped and coated but the rest of the board is left bare — fine under texture or in a closet, but not under flat paint in a room full of light. A level-5 finish adds a thin skim coat across the entire surface, sanded smooth and primed, so the wall reads as one continuous plane.
It matters most where light is unforgiving: walls that catch low morning or evening sun, big windows, or any room painted flat or matte. Raking light across an un-skimmed wall throws a shadow on every seam and roller mark. A full skim coat is how you get a wall that stays smooth and even no matter how the light hits it.
How to skim coat a wall, step by step
The technique isn't hard, but it rewards thin coats and patience. The most common mistake is trying to do it in one heavy pass — that leaves ridges, dries slow, and sands forever. Build it up instead.
Clean and prep the wall
Strip any wallpaper and wash off glue residue, knock down loose or proud texture, and wipe the wall free of dust so the skim coat bonds to a sound, clean surface.Prime or seal where needed
Seal glossy areas, repairs, and any wallpaper-glue residue first so the mud bonds evenly across the whole wall instead of skipping over slick spots.Mix the mud
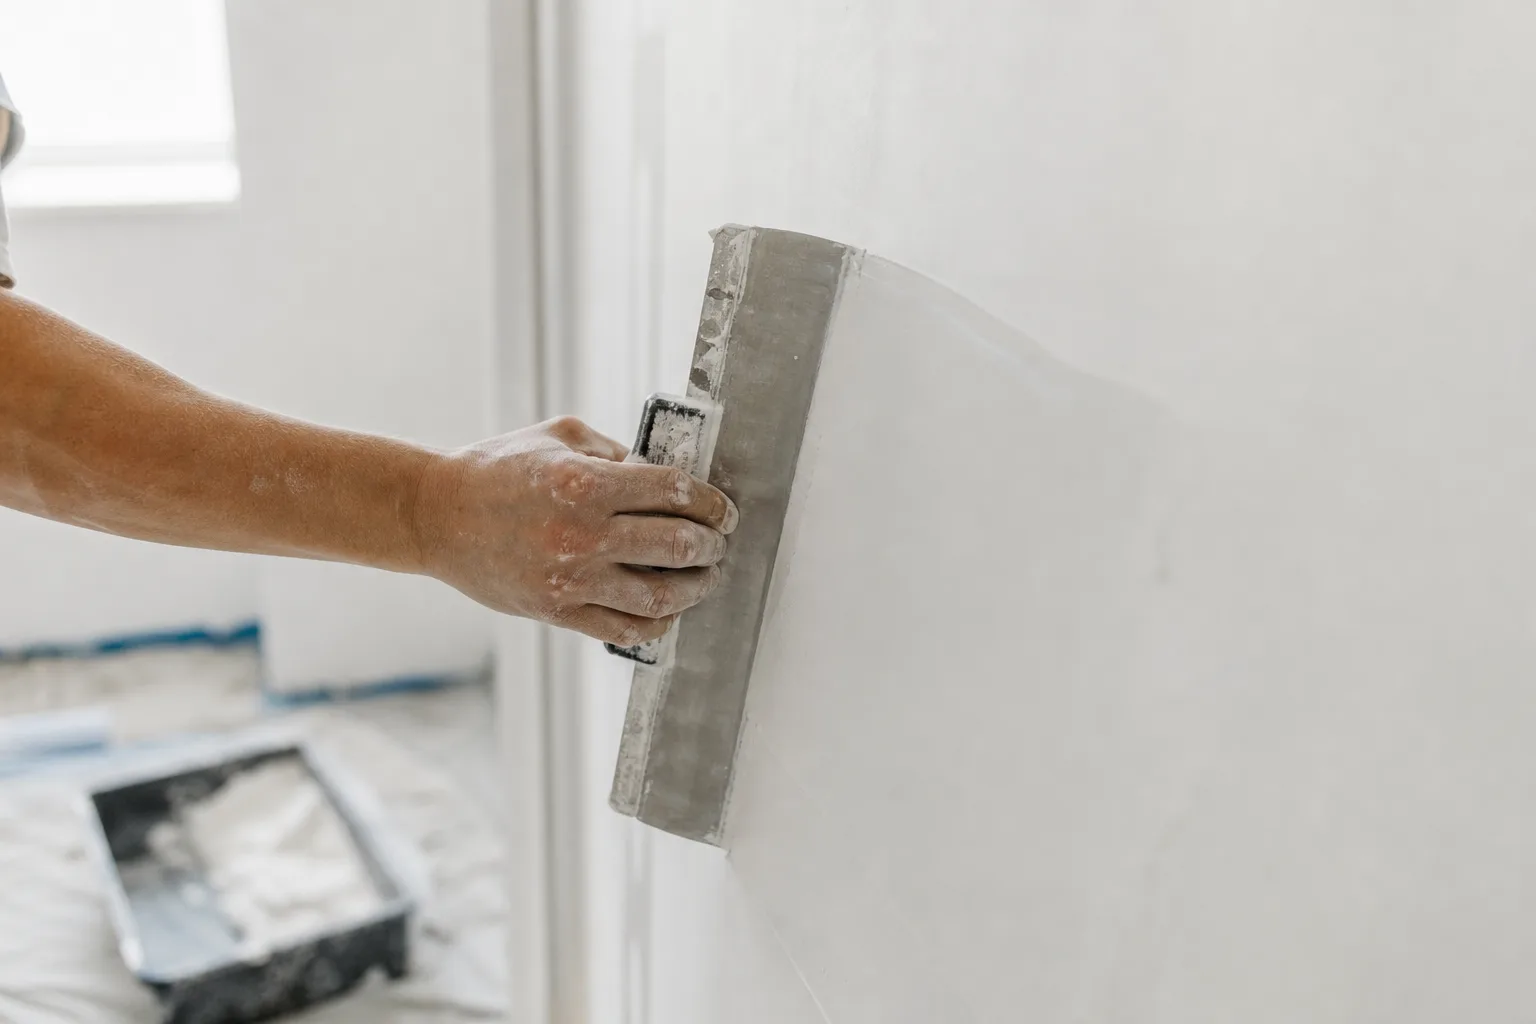
Thin all-purpose or lightweight joint compound to a smooth, spreadable consistency — about like cake icing — so it drags flat without tearing.Spread the first thin coat
With a wide trowel or knife, spread a thin, even layer across the full wall, working in sections and scraping off the excess so you fill lows without building ridges.Dry and lightly sand
Let the coat dry fully, then knock down ridges and high spots with a light sanding so the next coat goes on flat.Second and third coats
Spread another thin coat to fill what's left, sand between coats, and add a third only where low spots or old texture still show through.Final-sand and prime
Sand the whole wall smooth under raking light to catch every shadow, vacuum the dust, then prime the bare compound so the finish paint goes on uniform.
A few things that separate a smooth result from a wavy one: keep the trowel at a low, consistent angle; overlap your passes; and don't fight the mud as it sets — let each coat dry before you sand. Check your work with a light held close and angled across the wall, the same way we read texture before a repair.
When to call a pro
Skim coating a small wall is a reasonable weekend project. Skim coating a whole room — or a great room with tall, light-washed walls where every flaw shows — is where it gets humbling fast. Getting a large surface dead-flat, dust-controlled, and ready for flat paint is a real skill, and the sanding alone can bury a DIYer.
If you've got a wall that needs to be perfect, or texture across a whole home you want gone, that's our wheelhouse. Our drywall repair and painting crews skim, sand, prime, and paint as one job, so you get a smooth wall and a finished room without living in dust for a week. For the full picture on repairs and finishes, start with our drywall repair and texture-matching guide — and if the project started with wallpaper, our guide on removing wallpaper and repairing the wall before painting covers the step that comes first.
When you're ready, we'll come out for a free in-home estimate and a written quote within 24 hours, backed by our 3-year workmanship warranty. We accept payment by cash, check, or credit card. Family-owned and serving the Gulf Coast since 2013.