
When it comes to a nice paint job, surface prepping is everything! Did you know that over 75% of paint failures are caused by poor surface preparation? That’s a big deal—because no matter how expensive the paint is or how good your technique, the job won’t last if the surface isn’t ready. Surface prep before painting is what separates a durable, clean finish from one that cracks, peels, or bubbles in a few months. Paint needs a clean, dry, and properly textured surface to bond. Without that, the job fails before it even starts.
In this blog, we’ll cover the following topics:
- Why surface prep matters
- What tools you need
- The right steps to follow
- Mistakes to avoid
We’ll also answer common questions like: “What is the first step in surface preparation before painting?” and “Can I use rubbing alcohol as paint prep?” If you want long-lasting, professional-looking results—prep is where it starts.
Why Is Surface Prep Critical for Paint Success?
So you are ready to get started with your paint project. Sometimes DIY projects are the way to go. It is important to understand what the first step in surface preparation is before painting. It matters even more on the Gulf Coast: in the humidity and salt air around Mobile County — from older homes in Midtown and Spring Hill to newer builds out in West Mobile — paint that goes on over an unprepped surface fails far sooner than it would in a drier climate, so the prep is what makes a finish last here.
A. The Science Behind Paint Adhesion
Paint doesn’t just “stick.” It bonds to a clean, stable surface. Contaminants like dirt, oil, wax, or grease act as barriers. Even if the surface looks fine, these invisible layers cause bubbling, streaking, or peeling once paint is applied. This can lead to needing to repaint sooner than expected.
B. Cost of Skipping Prep Work
Wanting to save time and get started and finish a project is a good idea. However, skipping surface prep can lead to early chipping, cracking, or peeling. That means repainting sooner, spending more on materials, and possibly damaging the surface underneath. The cost of skipping prep work could end up costing you more money.
C. Professional vs. DIY Results
Hiring professional house painters or taking it on as a DIY project is a big decision. Surface prep is where the pros don’t cut corners. Every high-end paint job starts with prep. In fact, research shows that proper prep directly improves both durability and final appearance.
RELATED: Hiring a House Painter in Alabama? Ask These 4 Questions
So—what is the first step in surface preparation before painting? It’s basic but crucial: clean the surface thoroughly. From there, each step builds toward a better, longer-lasting finish.
The Essential Steps of Surface Preparation
A. Step 1: Initial Cleaning and Assessment
The first step in surface preparation before painting is to clean the surface. Remove dust, cobwebs, grease, and other debris using mild soap and water. Once clean, look for peeling paint, cracks, dents, mold, or damaged areas. Flag spots that need extra repair like nail holes, dents, and cracks . A degreaser works well to loosen and get rid of dirt buildup.
B. Step 2: Deep Cleaning and Degreasing
Use degreasers or specialty cleaners to remove oil, wax, and buildup—especially in kitchens, garages, and around light switches or handles. Don’t rely on water alone. These hidden contaminants can ruin adhesion even after sanding. Clean the surface of any residue and dry properly.
RELATED: Professional Tips for How to Clean Kitchen Cabinets Before Painting Them
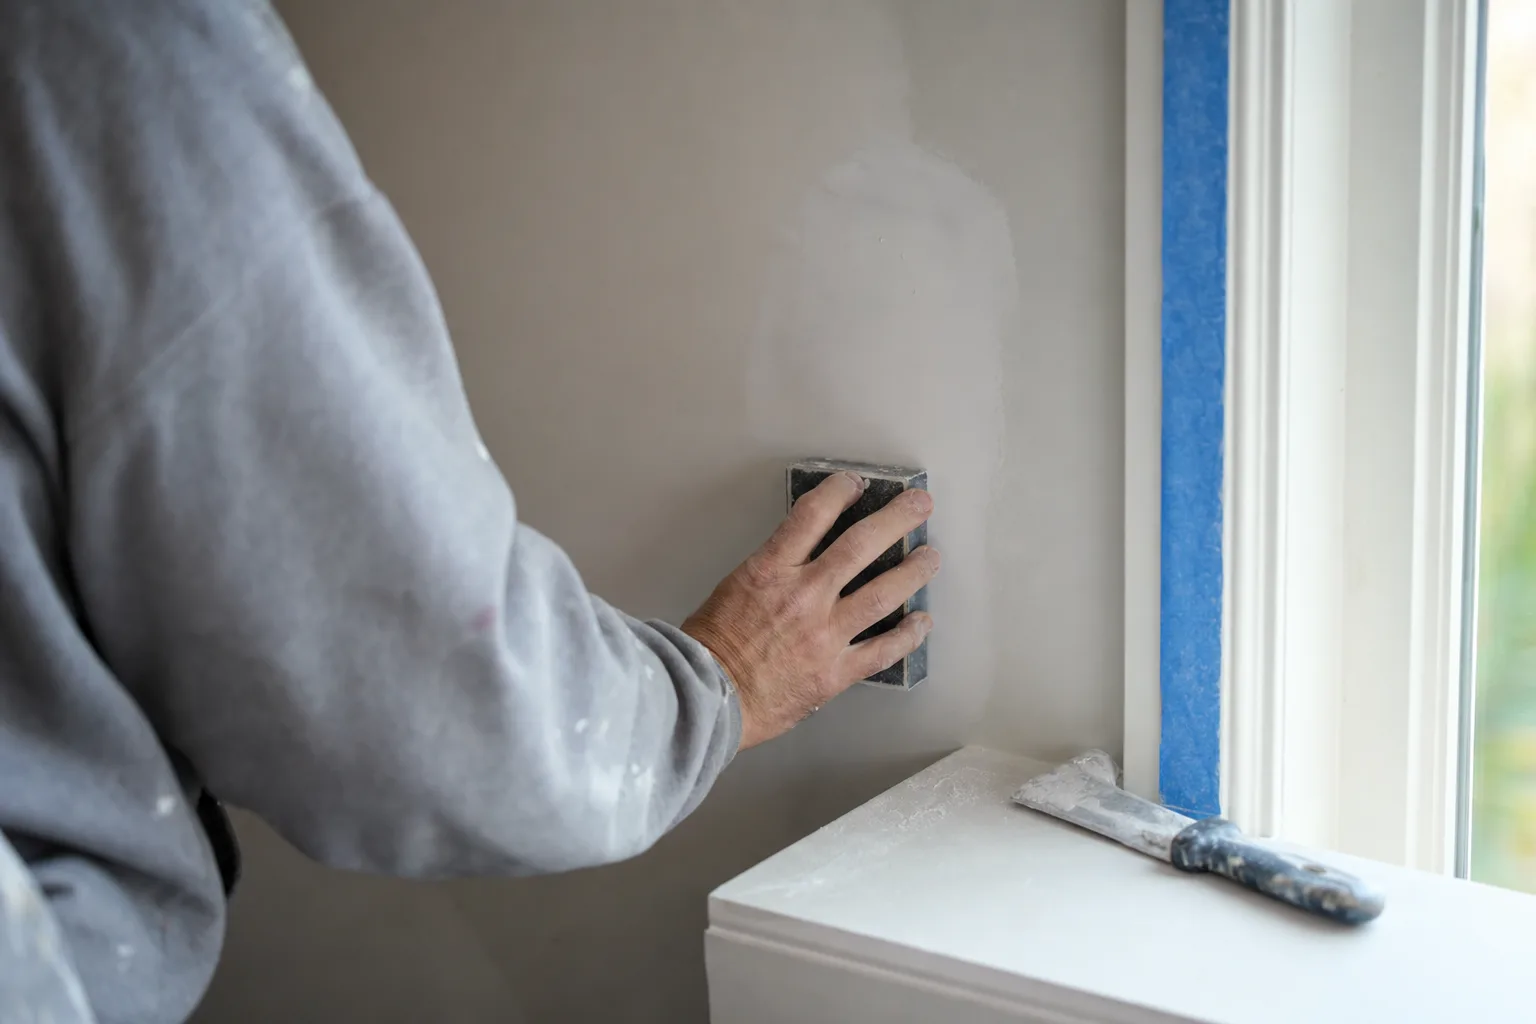
C. Step 3: Sanding and Surface Texturing
After you have cleaned the surface thoroughly, a bit of sanding may be a good idea. It prepares the surface and leaves the right (rough) texture for paint to grip. Paint adheres to this type of surface much better. Use 80–120 grit for heavy removal or rough surfaces and 180–220 grit for smoothing before priming. Always wear a dust mask and goggles. Use sanding blocks for control or orbital sanders for large areas. Follow all safety precautions on the box.
D. Step 4: Final Cleaning
After sanding, wipe everything down with a tack cloth or damp rag. Properly dry the surface and remove any excess dust before priming. Skipping this step leads to weak adhesion and uneven paint.
Tools and Materials for Effective Surface Prep
A. Essential Cleaning Supplies
As with any project, having the right tools gathered helps the job go more smoothly. Use degreasers, soap, and warm water for heavy grime.
Can I use rubbing alcohol as paint prep? Yes! Rubbing alcohol is an effective degreaser for removing grease and other contaminants. It is perfect for light degreasing and dust removal just before painting. It evaporates quickly and doesn’t leave residue. Use a lint-free cloth to wipe the surface clean.
B. Sanding Equipment
While sanding can provide a surface for paint to adhere to, sanding is not always necessary for every paint project. Here are a few painting scenarios for which we highly recommend sanding:
- Bare wood that has never been stained or painted.
- Previously painted surfaces now peeling or flaking.
- Metal surfaces that are rusting.
- Surfaces (drywall) with small holes or cracks previously repaired.
- Previously painted surfaces with a high-gloss finish.
Choose the right sandpaper grit for your surface: rough: 80–120 or smooth finish: 180–220. Use hand sanding for control or power sanders for larger projects. Always begin with the least rough sanding and increase depending on outcome.
C. Safety Equipment
Safety equipment is important when taking on a DIY project. These projects create dust and debris that can become lodged in your eyes. Always wear dust masks, safety goggles, and gloves to protect your face and hands. It is also crucial to work in a ventilated area, especially if using chemical cleaners indoors.
Common Surface Prep Mistakes to Avoid
Mistakes can happen but following the above guidelines and steps will help your project turn out great. Here are some additional common mistakes to avoid:
- Rushing the cleaning process.
- Using the wrong sandpaper grit.
- Skipping degreasing (especially on glossy or oily surfaces).
- Painting over damp, wet surfaces or repaired surfaces.
- Forgetting to remove all sanding dust.
Any of these can lead to poor paint adhesion or unprofessional finishes. Take your time and do it right the first time. More than that, it can lead to having to repaint sooner than would be necessary which can be more costly.
Surface-Specific Prep Tips
Different surfaces call for different surface prep. Keep these tips in mind:
- Wood: Sand smooth, fill holes, and remove dust.
- Metal: Remove rust; use metal-specific primers.
- Previously painted surfaces: Light sanding to dull the surface helps new paint stick.
- Plastic/composites: Use fine-grit sanding and primers made for plastic.
Each material has its own prep process—know what you’re working with before prepping and painting.
Get Better Results With Proper Surface Prep Before Painting
Proper surface prep before painting leads to a professional, long-lasting paint job. Skipping any step can jeopardize the outcome of your paint project. Have patience and move through each step with confidence.
Putting in the work upfront—your results will look better, last longer, and protect your investment more effectively. Following the above steps along with the right primer makes all the difference.
Not in a DIY mood? Call the professional painters in Baldwin and Mobile county at 251-621-1100 or visit our contact page for a free, no pressure estimate. We have the skills, years of experience, and knowledge backed by hundreds of reviews from happy customers. We love to paint, and it shows.