
A popcorn ceiling looks like the easiest thing in the house to repaint and turns into the messiest. You climb up with a roller, make one pass, and chunks of that bumpy texture come off on the nap and rain down on the floor — and now you've got a bald patch, white flecks everywhere, and a ceiling that looks worse than when you started. The texture isn't bonded the way drywall is; it's a layer of loose stippled material, and a wet roller treats it like something to scrub off.
The fix is mostly about how you put the paint on. Done right, you can paint a popcorn ceiling so it comes out clean, even, and bright without losing a single peak — and most of the trick is choosing the right method and prepping the room so the inevitable drips have nowhere bad to land.
Spray vs. roll: which one should you use?
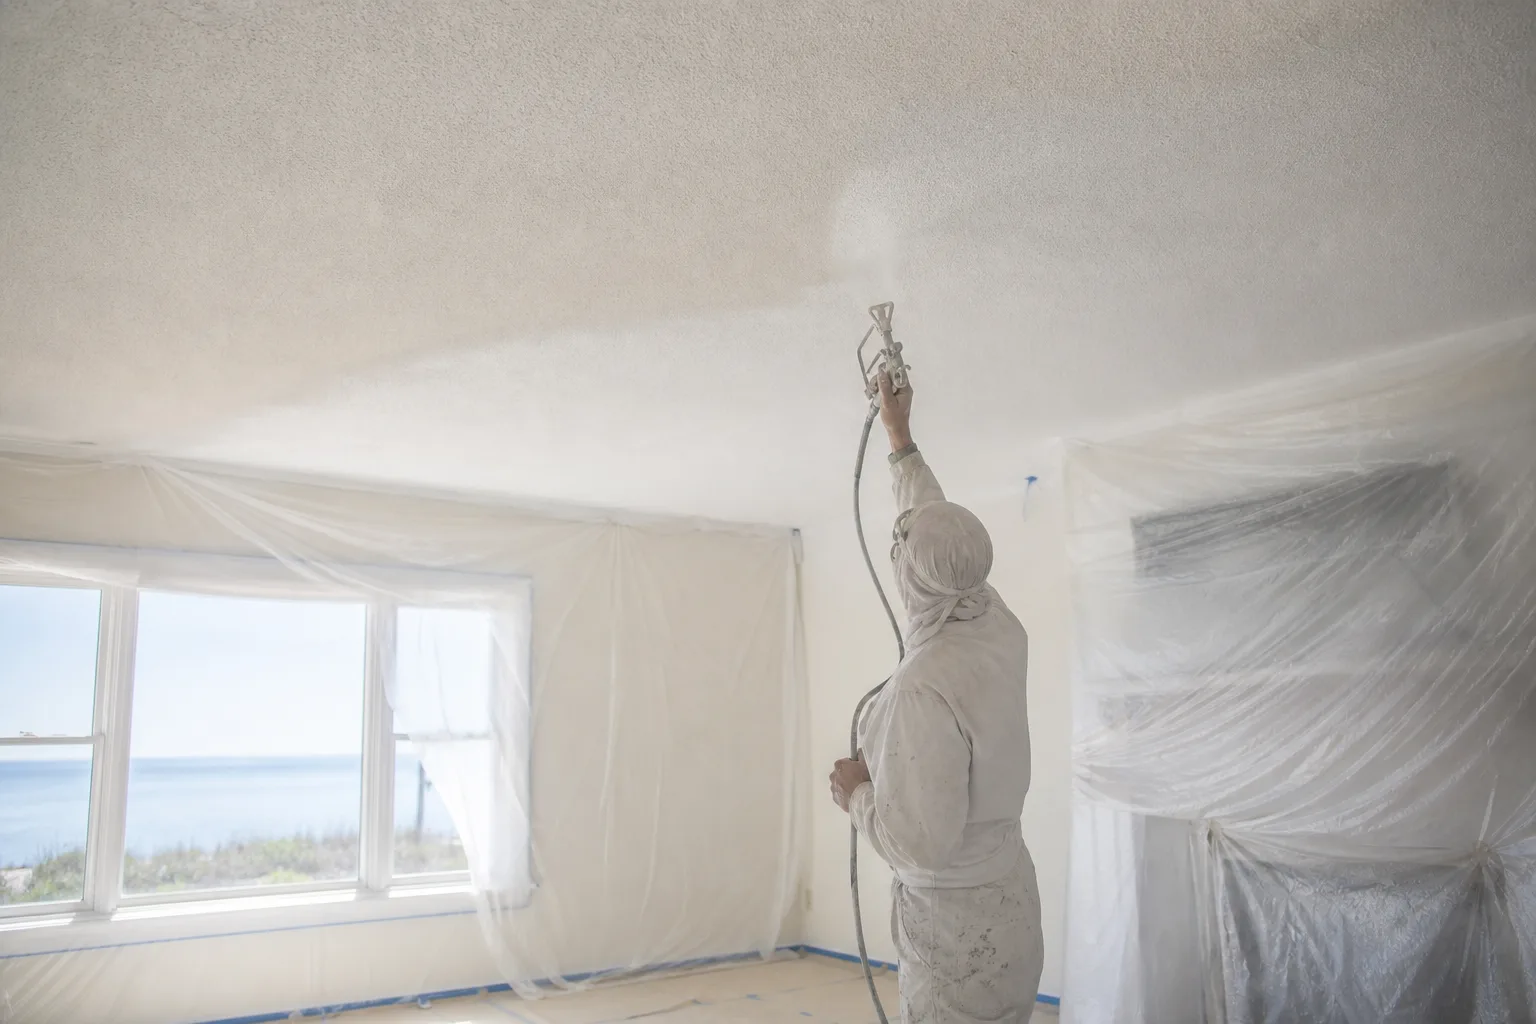
Here's the short version: spraying is the cleanest way to paint popcorn, because the paint never touches the texture until it's already a fine mist landing on the surface. Nothing drags, nothing pulls, nothing rolls off. A sprayer also pushes paint down into the deep valleys between the bumps — the spots a roller bridges over and misses — so you get full, even coverage in one pass. On a whole room or any ceiling that's a little fragile, spray is the answer almost every time.
Rolling can work, but only when the texture is well-stuck and already painted, the room is small, and your hand is light. The make-or-break detail is nap thickness. A standard roller is useless here — you need a thick 3/4-inch or 1-inch nap that reaches into the valleys. Load it heavy, lay the paint down in one slow pass, then lift. No back-and-forth. The second you work the roller like a wall, you're tearing texture loose.
Prime the stains before anything else
Popcorn ceilings are stain magnets, and on the Gulf Coast that usually means moisture. A brown water ring from an old roof or AC-line leak, smoke film, or a yellowed patch will bleed straight up through a fresh coat of white — sometimes the same day, sometimes a week later — if you just paint over it. The only thing that stops it is a stain-blocking primer on the mark first. Match the primer to the stain, seal the mark, and let it dry before any color goes on overhead.
There's a second reason to prime. Bare or never-painted texture drinks paint unevenly and can flash blotchy, so a primer coat evens out the porosity and helps your color cover. It's also a big reason popcorn so often needs a second coat — the texture eats paint, which ties into how many coats interior surfaces really need. A ceiling that's already painted and clean can usually skip straight to the topcoat, but the stains never skip the primer.
Check for loose texture first
Before any paint, push gently on the ceiling here and there, especially around past leaks and seams. If the texture flakes, sags, or comes away under light pressure, it's not ready to paint — and painting over it makes things worse, because wet paint adds weight that can pull more of it down. Loose areas need to be scraped back and the texture patched, or the spot skim-coated smooth, before color goes anywhere near it. If big sections are failing, you're looking at a repair before it's a paint job, and that's worth an honest look rather than burying it under a coat.
While you're up there, knock down cobwebs and dust the surface dry. Don't wash a popcorn ceiling — water loosens the texture and you'll make the very mess you're trying to avoid.
Prep the room like you mean it
Painting a popcorn ceiling is a drip-and-fleck job no matter how careful you are, so the room prep is where you actually keep it clean. The move is simple: cover everything. This is the same logic behind how painters protect floors and furniture during a job — assume paint will land where it shouldn't and seal those surfaces off ahead of time.
Clear or center the room
Move what you can out, and pull anything that stays to the middle. A ceiling job rains down, so the floor and everything on it is the target.Drape walls and floor
Plastic sheeting on the walls (overspray and fine flecks drift far), rosin paper or canvas drops on the floor. Tape the plastic up at the ceiling line.Mask the edges
Tape off the top of the wall where it meets the ceiling, plus any crown, vents, and light fixtures. Drop or bag ceiling fans and fixtures.Cut in the perimeter
Brush a few inches of paint into the ceiling edge by hand first, so your sprayer or roller isn't fighting the corners where texture meets wall.Apply, then second-coat
Lay your first coat in one direction, let it fully dry, and add a second coat if the color isn't uniform — popcorn often needs two because the texture eats paint.
That last point catches a lot of people off guard. All those peaks and valleys are extra surface area, so a popcorn ceiling soaks up far more paint than the same square footage of flat wall — if you want to size it before you buy, our note on how much paint you need for a room is a good starting point, then add a margin for the texture.
Use flat ceiling paint
Reach for a flat ceiling paint, not a wall finish. Flat has no shine, so it hides the bumps, the laps, and every surface flaw that overhead light loves to expose, and it gives the smooth, shadow-free look people expect when they glance up. Bright white is the standard pick and makes a tired room feel taller and cleaner instantly. Don't put a sheen up there: eggshell, satin, or semi-gloss catches the light and turns every flake of texture into a visible flaw. (Sheen is the right conversation for your walls — a different decision we break down in our guide to the best interior paint sheen for every room.) For a clean white, a flat like Sherwin-Williams in Pure White or a dedicated flat ceiling white covers popcorn well and stays dead flat.
Bottom line
Painting a popcorn ceiling cleanly comes down to method and prep: spray it if you can so nothing drags the texture loose, use a thick nap and one gentle pass if you roll, seal every stain with a stain-blocking primer first, fix any loose texture before you paint, drape the room top to bottom, and finish in a bright flat ceiling paint. Do that and you get a fresh, even ceiling instead of bald patches and white flecks ground into the carpet.
If you'd rather not balance on a ladder breathing overspray, our interior painting crew sprays popcorn ceilings clean across Mobile and Baldwin County, stains sealed and the room fully protected before we start. One accountable crew runs your job from the free in-home estimate to the final inspection, and you'll get a written quote within 24 hours — all backed by our 3-year workmanship warranty and 4.8-star Google rating. Book your free estimate and let's get that ceiling looking new.